Friday, January 11, 2013

Thank you, Ikea!

The entryway from our garage was always a mess of shoes, jackets and backpacks. Despite having an open rack shoe organizer in the closet, the shoes always ended up in a pile in front of the rack. "Closet filler" was not exactly its intended purpose. So, when I stumbled upon this gem online buying one as soon as possible was a no brainer.

Ikea's about 45 minutes from our home, and while that's not too horribly far, I like to buy as much online as possible. With two little kids and another on the way the idea of tackling a 90 minute round trip drive and shopping was not very appealing. There were a couple available on ebay, but I wasn't about to pay twice of what they were asking in the store so off to the store we went.

Thankfully, my mother met us there and was able to help us. I wouldn't have been able to do it without her.

Jack made quite a few purchases.


These made it all worth it! Now our shoes are beautifully organized and off the floor. Wonderful.


Thursday, January 10, 2013

Painted Ornaments

This year I decided to give painting ornaments a try after seeing some beautiful pictures online. Unfortunately, there was no tutorial provided with the pictures so I tried a couple different techniques on my own.

The first technique was "squirt the acrylic paint in, replace the top, and shake." Needless to say this didn't work very well. If I was lucky, half of the ornament would end up with paint, but the other half became impossible to coat no matter how hard we shook them.

The second technique was "add a little water and shake." This was when I learned that water and acrylic paint are not friends. They don't like to socialize and will be unkind to one another if forced to do so.

The third technique was "squirt the paint in and smear it around with a brush." The worked pretty well and gave a interesting, impressionistic look to the ornament, but given the size of the brush handle it because impossible to paint the top half of the ornament.

Unsatisfied with half painted ornaments, I grabbed a few cotton swabs, bent them as necessary, and was able to finish all of the ornaments with complete coats of paint.

Grace, my three-year-old, helped me. We used a variety of colors, and let them dry in a muffin pan.

Overall, I was pretty pleased with how they turned out. The blue and green one was my favorite; it reminded me of Monet's Water Lilies. Sadly, they never actually made it to the tree. The season was over before I knew it, but I'm planning on putting them up next year.


Wednesday, January 9, 2013

2013 Mission: Organization

I'm very excited to share my new daily planner for 2013. I've always loved organizers and color coding events (which is becoming a necessity with our growing family), but it's been difficult for me to find a planner that works well for us. So this year, instead of searching high and low only to finally settle on something mediocre, I decided to just design one myself that will perfectly suit our needs.

(If you'd like your own personalized version visit my new etsy site. The link is on the right side bar.)

The cover:

My Weekly Pages

I wanted to make sure I had enough room for our various daily activities, notes, and a to-do list. 
I included the meal planning portion of the page because it's something I'm currently horrible about tracking. Every once in a while I do a good job planning out meals for the week, but we spend way too much on restaurants because of the convenience and usually poor planning on my part.


I also made a page for special dates so I can easily track birthdays, anniversaries, 
and other important events.

I'm also thinking about printing out a separate copy for family activities.


 I also made pages for contacts, notes, and a calendar for each month.


I also love that if something happens to the pages I can print more. Here's to a more organized 2013!


Hello Smiles

With the new year comes the exciting task of planning, organizing, and baking for the various upcoming birthdays we will soon be celebrating. Within the span of three weeks we celebrate three birthdays, and now with our newest little addition on his way that number will increase to four. So if you want cake this spring now you know where to go.

Last year, my daughter requested a Hello Kitty cake. I also made Hello Kitty cake pops inspired by those I found on Bakerella's site. (Click here to visit her site. Just prepare to be amazed, inspired, and create a fun mess in the kitchen.)

These were my first attempt at cake pops, and while the first couple looked a little gruesome Grace didn't seem to mind at all.


After a little tweaking they got better.


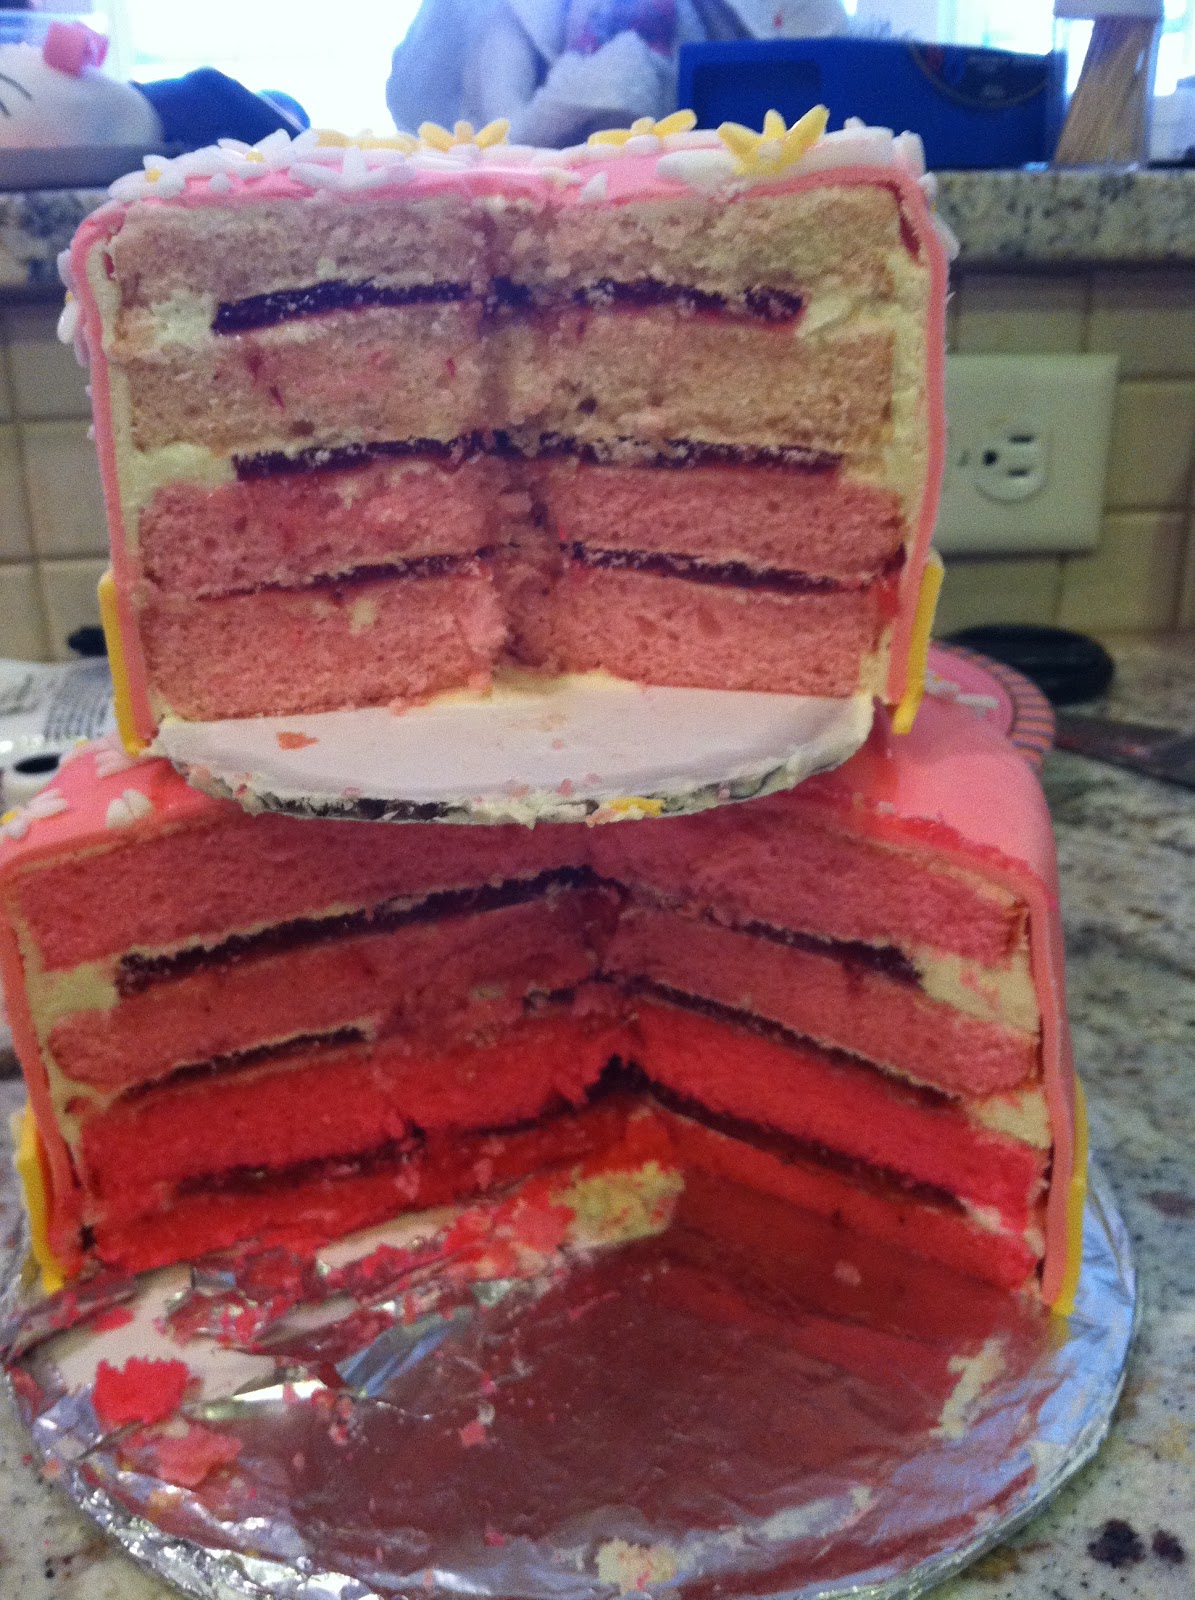
As for the cake, I started by making my own fondant. I've used store bought fondant before, and I found it hard to color and difficult to work with so making my own seemed to be the only way to go.


 I added pink food coloring to create a pink ombre surprise for when the cake was cut.


And here's the final result.


 Grace now refers to her third birthday as her "Hello Kitty birthday" so I'll mark this one as a success. This year she wants to have a Tinkerbell birthday... let the planning begin!

Tuesday, January 8, 2013

Counting Down to Christmas

We still haven't completely settled in from our move, but that didn't stop me from breaking out my Cricut machine and getting crafty for Christmas. I haven't used it nearly as much as I anticipated when I bought it last year, but given that we moved and have three (soon to be four) kiddos I'm not going to beat myself up too much.

I can't take credit for the design as I copied one I saw online (with a few of my own tweaks here and there), but it was a great addition to the Christmas season and a nice, new tradition for our first holiday season in our new home.

My three year old, Grace, was kind enough to play Vanna White for a picture.


The aftermath...


This project took a lot longer than I expected, which meant that by the time I was finished I was exhausted. Unfortunately, the crafting fairy never arrived to clean up after me. This is just another reason I'm anxious to have a craft room/office set up and organized. Once everything has its own place I'll be able to work in a cleaner fashion... or at least shut the door and not have to look at it.


I'm Meltiiiiiing

These are the cookies I made for my son Daniel's class Christmas party (inspired by, where else, Pinterest). I was pretty happy with how they turned out. I did the white melted snow and detail work in royal icing, which I realized a couple days later wasn't the best choice when I almost chipped a tooth. For the first day or two the royal icing was great, but when it solidifies it doesn't mess around. It's like a confectionary concrete. Now I know why cakes at bridal shows always look so gorgeous.


Board and Batten

I'm excited to share that my days of dreaming about and lusting after board and batten have finally paid off. We have installed some in our new home! The entryway from the garage is somewhat tight. There are two closets and two hallways. One hallway goes straight into the kitchen and the other to the laundry room. We are using one of the closets as a makeshift pantry (one of the few desired features our new home is lacking) and the other for coats and shoe storage.

Given that we have young children, I really wanted a place for hooks so they can hang up their jackets and bags without assistance. A 3M hook sufficed for a little while, but that wasn't really the look I was going for so when pinterest was kind enough to introduce me to the idea of installing board and batten with hooks I had to oblige.

We aren't finished with it yet. We still have to do some additional sanding (it's amazing how some imperfections really pop after a coat of white paint), repaint it a time or two, install the hooks, and decide on a paint color for the wall above, but just seeing board and batten installed in my home, and knowing that we did it ourselves is very exciting. Trust me, I'm the girl who would've paid someone to do this just a couple years ago. We actually got an estimate to have it installed in the dining room of our old house and couldn't believe it when the quote came back for $4,000! Needless to say, our walls stayed bare.

So here they are, the before and almost after pics: